 Hamachi is a zero-configuration virtual networking application with the ability create a secure network between computers regardless of firewalls or address translation devices (i.e. routers used for broadband connections). It has a simple and effective interface and can be used to create file sharing networks and/or gaming networks. A self-created network has a limit of 16 connections.
Downloading
Both the Windows and Linux clients are available on the Hamachi site. The latest Linux client can be found here. The Mac OS X client is available on site's forums.
The Windows installation is basic without any complications. Hamachi can also be run as a service in Windows. The Linux installation takes a more work, but still simple. A more detailed description is provided in the forums.
You'll need to have root privileges for installation:
tar xvfz hamachi-VERSION.tar.gz

sudo su

make install
tuncfg
hamachi-init
hamachi start
hamachi login
tuncfg is an additional program that is distributed with Hamachi, which depends on the tun kernel module being installed. To determine if the module is already installed
modprobe tunIf modprobe finds the module, it will not display a message, otherwise it will display modprobe: Can't locate module tun. For instructions on installing the module follow the instructions provided in the forums.
Hamachi comes with a "Magic Option" to force a connection through a specific port. In Windows, the option is located in Preferences -> System -> Troubleshooting. In Linux, for that option the following line in ~/.hamachi/config needs to be included (it may be necessary to create the file).
UdpPort <port>If you are using iptables, add the following rule in /etc/sysconfig/iptables (Fedora):
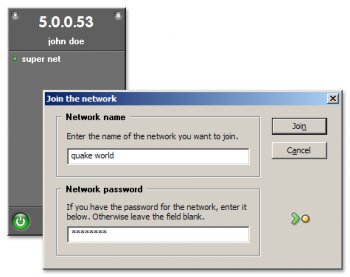
-A RH-Firewall-1-INPUT -p udp --dport <port> -j ACCEPTNow you'll either need to create a network or join a pre-existing one (these are included in the README):
hamachi createor
hamachi join
Seeing Other Users
To go online
hamachi go-onlineTo get the nicknames of the other users use
hamachi get-nicksIn Windows this is done by right-clicking and Set Label -> Default.
Sharing Files
In Windows, you can browse stuff by right-clicking a name and share stuff by right-clicking a folder in Windows, clicking the Sharing tab, then click on Share this folder and OK.
In Linux, you can share files using Samba and it will run the following commands:
iptables -t nat -o ham0 -j MASQUERADE
service iptables save
To browse files in Linux you can mount a computer's shares using smbclient:
smbmount //servername/sharename /mountdirectory -o username=username,password=password
No comments:
Post a Comment